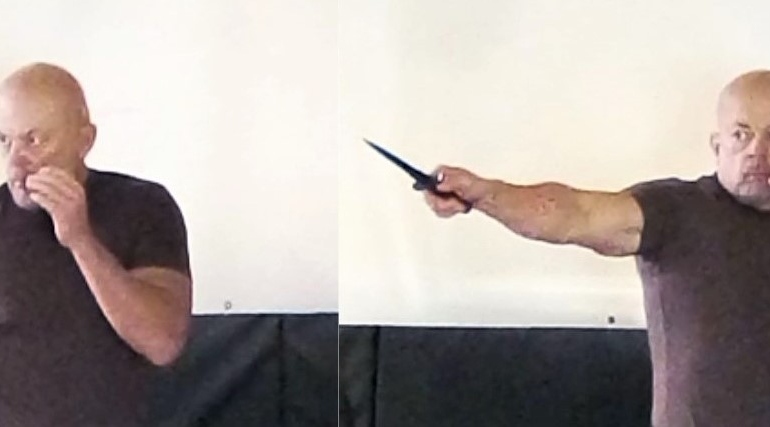
REVERSE HIP THROW (Neck and arm variation)
Straight forward and aggressive this variation of the reverse hip throw is very ballistic and powerful in application. It combines forward movement with the impact from striking the opponent’s throat with your right arm and getting head control.
This variation has the capability to be strong enough to seriously injure the opponent and end the fight. You can drive your opponent to the ground flat on his back, his head or completely over on his face and stomach.
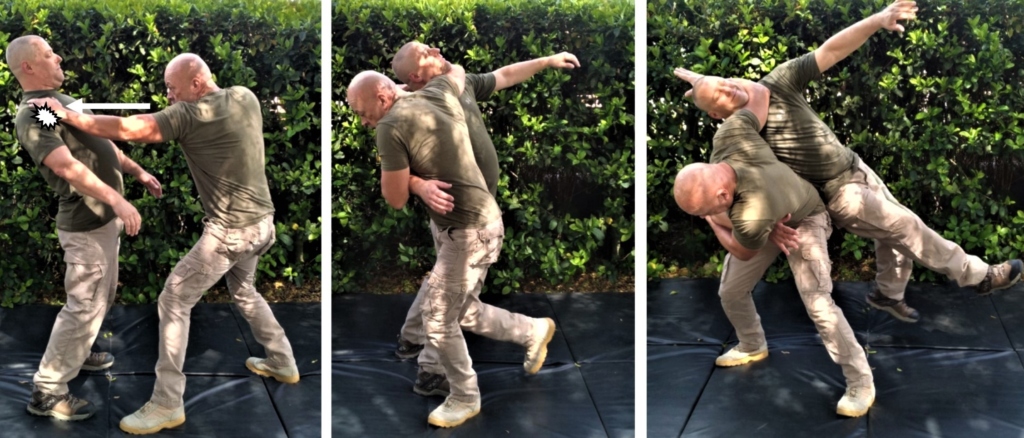
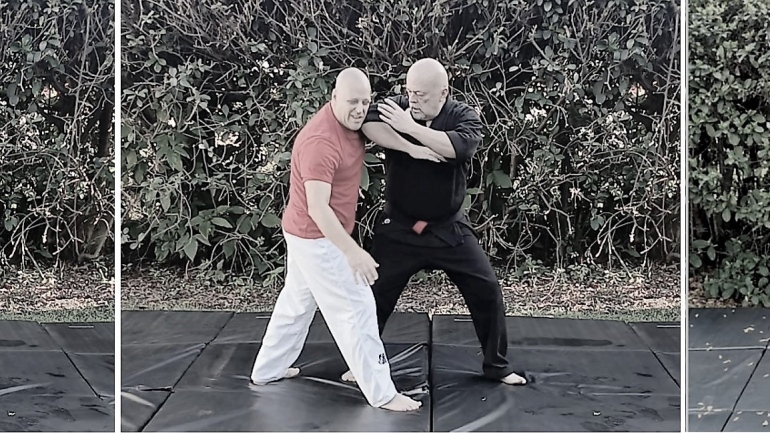
(1) From a fighting stance or non-violent posture step straight in with the left foot at the same STRIKE your opponent hard on his right shoulder with the heel of your left hand and grab his clothing at the area struck. The blow should be hard enough to cause him to momentarily lose balance. Push step off your right foot at an angle to your left, stepping to the outside of your opponent’s right foot with your left foot.
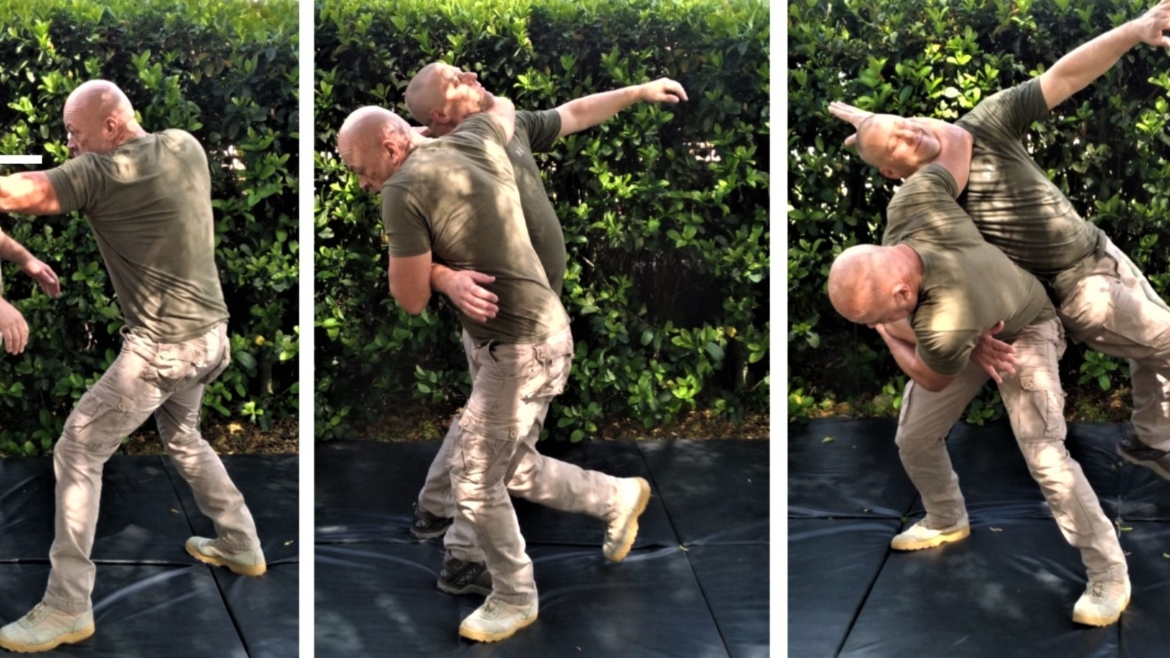
(2) At the same time grasp your opponent’s right arm with your left hand at the tricep. Strike the opponent’s throat with the bicep of your right arm encircling his neck. Step around your opponent with your right foot and place it directly behind him. Thrust your hips to your right as far as possible to gain buttock to buttock contact, pulling your opponent into position on your right hip and suspending him in midair. Your opponent’s right arm should be locked in to your side with your left elbow. Your knees should be bent, feet shoulder width apart and your body bent forward slightly.
(3) Using your right hip as the fulcrum, straighten your legs thrusting your hips upward. Continue the pull with the left hand. At the same time bend forward turning your torso to the left while finishing the pull forward and downward with both arms driving your opponent into the ground. Throw the opponent over your right hip and NOT over the outside of your right leg. Maintain your arm lock on the opponent’s right arm.
(To do a left reverse hip throw substitute the word “left” for “right” and “right” for “left”.)
How to train the reverse hip throw
When in training strive for precision and accuracy. Do each PHASE of the throw with deliberate action. Once you have thoroughly learned the throws work for speed through constant practice.
PHASE ONE – You should enter and disrupt simultaneously. Entry and disruption should be accomplished in one move. As specified in instructions, take a step forward with your left foot. At the same time STRIKE your opponent hard on his right shoulder with the heel of your left hand and grab his clothing at the area struck.
PHASE TWO – Left hand pulls as you enter, pushing off the right as in a sprint with knees bent, axis forward and stepping to the outside of his right foot and around behind him with your right foot, your right arm goes encircles his torso under his arm.
You should not feel like you are loading him onto your hips or “muscle” him up on your hips. (If you feel like you are picking him up with your arms to get him over this generally means: 1.) You are going in too high; your knees aren’t bent enough and your hips are not lower than your opponent’s hips. A good rule of thumb is to ensure that your belt line is a few inches lower than his. 2.) You aren’t stepping in deep enough.) Phase two ends with opponent suspended on your hip. Your opponent should be already teetering on your hip BEFORE you straighten your legs.
PHASE THREE – Straighten the legs and pop your hips upward at the same time as you finish throwing your opponent to the ground then work Follow up and Recovery techniques.
Follow up and Recovery
Follow up and recovery techniques are striking techniques or control and restraint techniques that disable the attacker’s ability to injure you AFTER you have thrown your opponent to the ground. Follow up and recovery techniques should be executed as quickly as possible. After the throw your opponent will land at your feet, he will be open to strikes, kicks and stomps to vital areas as well as strikes with edged or impact weapons.
Your Follow up techniques whether lethal, non-lethal or control and restraint techniques must be applied immediately after the throw as the fall from the throw itself may not be disabling.
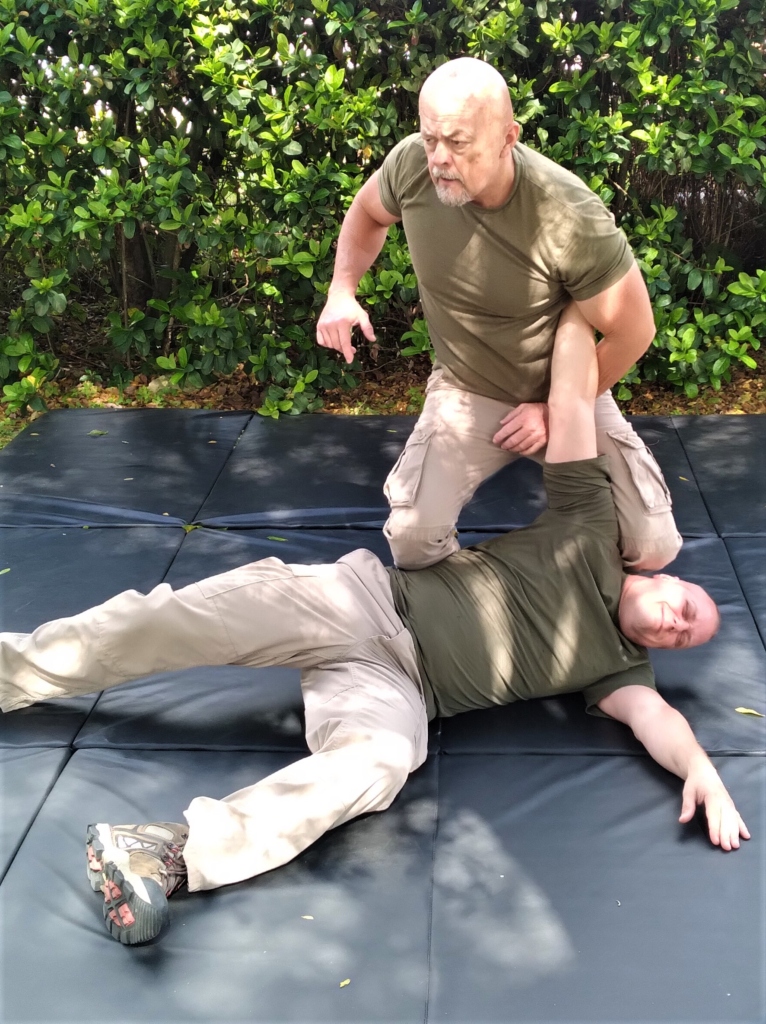
When it comes to control and restraint the more points of control the better. However, whether civilian, Law enforcement or military an awareness of what is going on around you must be maintained. The picture (right) shows three points of control, knee and shin to opponent’s torso, arm control and Knee and to side of head.
For law enforcement:
Control and restraint techniques such as arm bars, wrist locks and other joint manipulations into hand cuffing techniques need to be applied quickly. In this instance you have the suspect on the ground but need to turn him face down and over on his stomach.
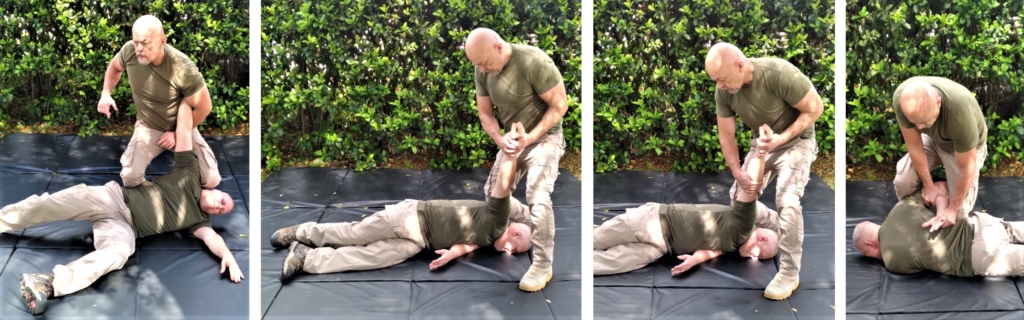
(1.) From the 3 points of control, step around his head with your left foot. Move your right knee tight to the back of the suspects shoulder. Grab the suspects trapped arm at the wrist with your right hand while maintaining pressure on the back of his shoulder with your knee.
(2.) Get two on one control of suspects wrist. Apply pressure with the knee downward and against the back of suspect’s arm and pull his arm back to your right hyper extending the opponent’s shoulder at your knee and his elbow against your thigh.
(Downward pressure of the knee against the back of the shoulder will help keep suspect’s other arm pinned under him.)
(3.) Drive your knee downward forcing the suspect to rollover. Once he is over reach down with the right hand and place it in the crook of his elbow.
(4.) Pull on the suspect’s elbow causing his arm to bend. Simultaneously pivot on the left foot. Your right knee will pivot on the suspect’s shoulder using the shin to pin his arm. Move the suspects right arm to his back using the inside of your leg and place your knee on his back while maintaining control of the wrist. (If the suspect is struggling, trying to pull his arm in, this will make it easier to bend his arm at the elbow.)
IMPORTANT NOTE: If suspect goes to the ground almost to his stomach then start at step (2.)